


Table of contents

No headings in the article.
When we develop the RESTful API application, we need tools to test the API. There are some ways to do this. One is Postman, a client used to carry out HTTP requests to the API server. Another option is Swagger; it can not only be used to test your APIs but also generate the API documentation for your API. This is a very time-consuming task in REST API development, but Swagger makes it much easier.
Today I want to talk about the use of Swagger for API documentation in microservice development using Spring Boot and Spring Cloud (Eureka, API Gateway).
If you just use Swagger in a monolithic Spring Boot application, it's very easy. Firstly, you need to import the dependency for Spring Doc OpenAPI.
<dependency>
    <groupId>org.springdoc</groupId>
    <artifactId>springdoc-openapi-starter-webmvc-ui</artifactId>
    <version>2.0.4</version>
</dependency>
The next step is to configure it in the application.yml and Java file.
spring:
  application:
    name: user-service
openapi:
  service:
    title: user-service doc # title that you will want to display in the Swagger UI
    version: 1.0.0
    url: http://localhost:8080
springdoc:
  api-docs:
    path: /users/v3/api-docs
  swagger-ui:
    path: /users/swagger-ui.html
@OpenAPIDefinition
@Configuration
public class OpenApiConfigs {
    @Bean
    public OpenAPI customOpenAPI(
            @Value("${openapi.service.title}") String serviceTitle,
            @Value("${openapi.service.version}") String serviceVersion,
            @Value("${openapi.service.url}") String url) {
        final String securitySchemeName = "bearerAuth";
        return new OpenAPI()
                .servers(List.of(new Server().url(url)))
                .components(
                        new Components()
                                .addSecuritySchemes(
                                        securitySchemeName,
                                        new SecurityScheme()
                                                .type(SecurityScheme.Type.HTTP)
                                                .scheme("bearer")
                                                .bearerFormat("JWT")))
                .security(List.of(new SecurityRequirement().addList(securitySchemeName)))
                .info(new Info().title(serviceTitle).version(serviceVersion));
    }
}
In this example, I also enable the Security Scheme which uses "bearer" as the authentication scheme and "JWT" as the bearer format. This will allow us to enter a token in Swagger UI to test APIs that require authentication.
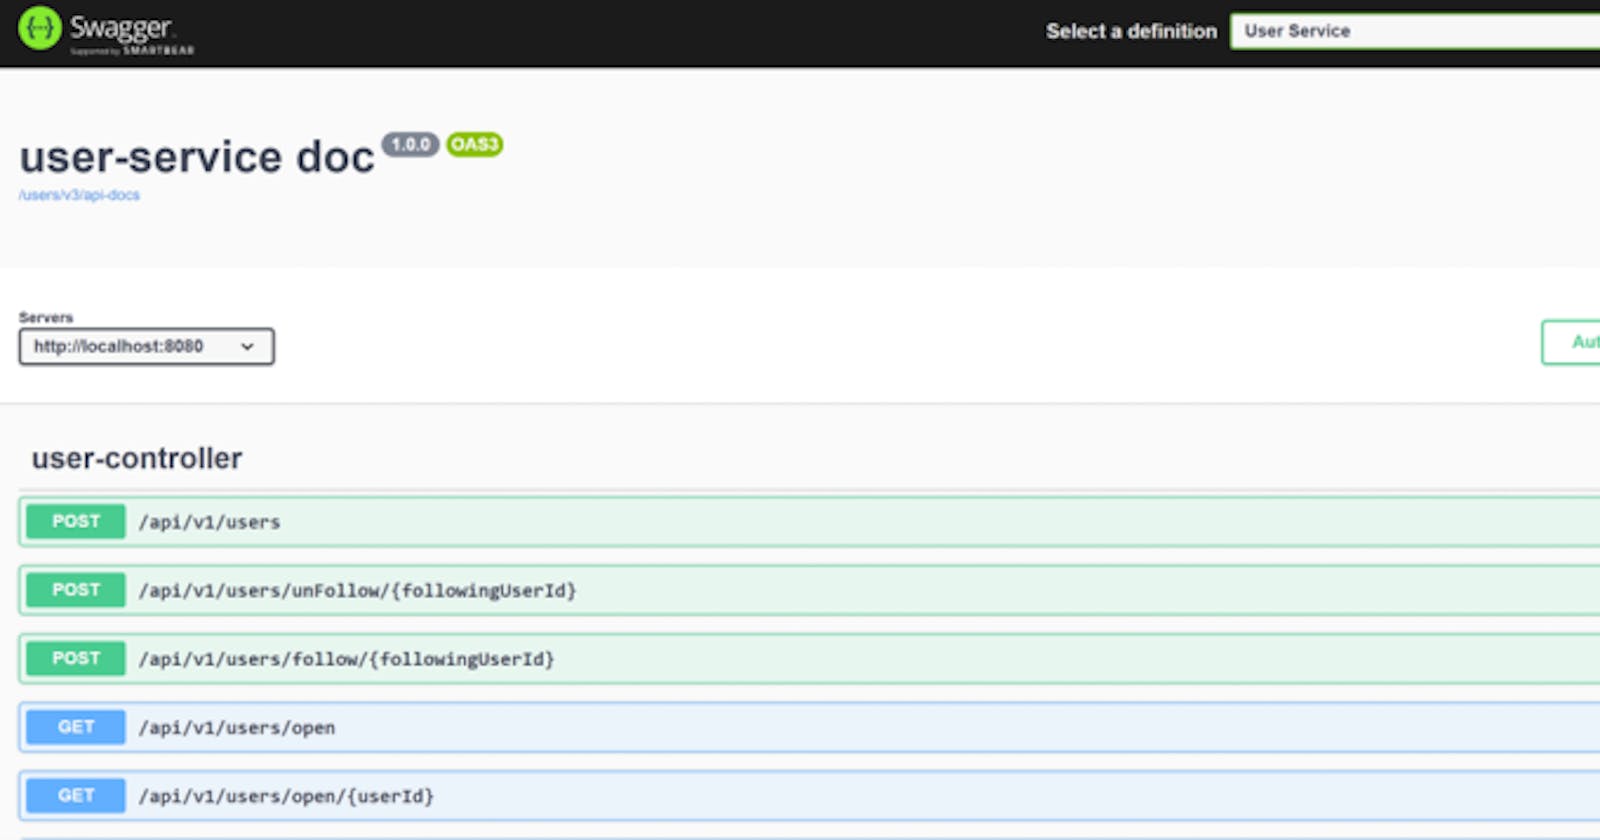
Now we are good to go. We start the application and open the browser with the address http://localhost:8080/users/swagger-ui/index.html; we can see the Swagger UI and all the REST APIs we defined in controllers.

When clicking "Authorize", we can enter the token.

What if we are developing microservices and need to display all API documents in Spring Cloud Gateway? Swagger provides this function. If you open http://localhost:8080/users/v3/api-docs, you can see a JSON document with all your APIs for this microservice. From here, we can get these APIs and display them in the Spring Cloud Gateway.

First, import dependencies in the Spring Cloud Gateway project.
<dependency>
    <groupId>org.springdoc</groupId>
    <artifactId>springdoc-openapi-starter-webflux-ui</artifactId>
    <version>2.0.2</version>
</dependency>
Note! This time we import "webflux-ui" instead of "webmvc-ui" since the Spring Cloud Gateway is a reactive application instead of a WebMVC project.
Second, add configuration in application.yml.
spring:
  application:
    name: apigw
cloud:
  gateway:
    routes:
      - id: user
        uri: lb://USER-SERVICE
        predicates:
          - Path=/users/v3/api-docs, /api/v1/users/** // add a route for Swagger api-docs


server:
  port: 8081


springdoc:
  enable-native-support: true
  api-docs:
    enabled: true
  swagger-ui:
    enabled: true
    path: /swagger-ui.html
    config-url: /v3/api-docs/swagger-config
    urls:
      - url: /v3/api-docs
        name: API Gateway Service
      - url: /users/v3/api-docs
        name: User Service
Within this configuration file, we add the route to /users/v3/api-docs for our microservice application. Then configure Swagger UI dropdown menus so that we can choose an API document.
OK, we are good to go. Let's visit the Swagger UI in our Spring Cloud Gateway application. The address is http://localhost:8081/webjars/swagger-ui/index.html. There is an additional "webjars" in the URL. It's a little bit different from before since we are using WebFlux.

We can switch the document through the dropdown menu on the right.

This is the user microservice API Document.

Thanks for reading. Hope it works well for you. Feel free to leave a comment below; let's make progress together.